Holy Trinity Science Fair
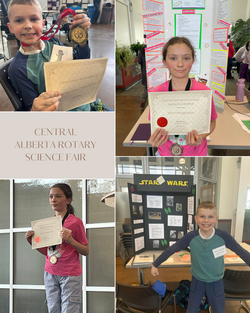
SCIENCE PROJECT
The purpose of a science fair project is to learn how experiments, observations and scientific thinking can be used to solve a problem. It is a planned step-by-step activity to explain how or why something occurred.
It is NOT an enlarged drawing or model, nor is it reports from the internet or charts from books.
PARENTS’ ROLE IN SCIENCE FAIR
Should parents have a role in science fairs? If your child is in sports, do you leave your own child to their own resources to compete successfully in sports/. Do you take them to games? Do you help them practise? Do you make sure they have the right equipment and is familiar with the rules?
If you answer “NO” to these questions, then let your child work on their own. If the answer is “YES”, then the same kind of direction and assistance is acceptable in a science fair project. You should no more DO the project for your child than you would go out and PLAY their hockey game for them. Sometimes there is no substitute for a parent’s support!
Not sure where to start? Get the fundamentals on how to do a science fair project here: How to Do a Great Elementary Science Fair Project and Board Layout - WeHaveKids https://wehavekids.com/education/How-to-do-a-Great-Science-Fair-Project-and-Board Just remember – the older the kid the higher the judging standards, make sure your project fits your grade level!
Ways that parents can help:
1. Idea – Something that the child (and parent) has an interest in. It can be a simple experiment which leads to a more complicated explanation. Try to come up with original ideas. The internet has ideas which students can use as a start but the student has to be able to explain the “So what” of the experiment.
2. Information – Help your child dig up information. The internet can be a good tool, but remember that all sites are not accurate. And if you use information from the internet, please make certain that your child can explain it on their own. All information sources must be put on the board including internet sources.
These must be dated as to the date the information was gathered and the site used.
3. Research – If the project does not work, don’t destroy it. Instead offer some ideas as to why it didn’t work. Parents may help to build the equipment. Please be certain that you do not do everything for the student.
4. Board – Put as much information on it as possible to aid the student. Help the child edit, but make sure it reflects the child’s own work. Some students choose to handwrite the board while some prefer to use the computer. Either is fine. Just make certain that it is legible! This can often involve a fair amount of nagging!! You can serve as the time management sector. Another option for a board is to make a poster to be displayed on a wall. Youth Science Canada (YSC) website offer many suggestions on how to do this, even at an elementary level. It also makes it easier for transport and for the judges to read. The trifold board must fit in a space of 1.2 metres.
5. Questions – Ask the student questions about his project whenever possible. Ask them in the car, at the supper table, etc. Remember, they don’t just stand there and look cute!
6. Project Summary – This is a SHORT description of the project. It is only necessary for Grade 5 to 12 projects. The summary should be concise, clear and NOT a restatement of the board.
7. Log Book – This is necessary for all projects in a science fair. It is not necessarily a neatly written document. It can be messy, even written on paper towel! It is a diary, or a record of what has been done every day. All of the results recorded on the board must be found somewhere in the log book. Remember to have the child enter EVERYTHING INTO THE JOURNAL – EVEN IF IT DID NOT WORK! Make certain to try the experiment many times and record all of the results. The date on which the trials have occurred also need to be in the log book .
8. Judging Form – One should be available at each school. It includes the following items:
a. Originality – did the project come straight from a book or is it completely original to the student. It can also be based on an experiment that was done in the classroom but should have original ideas added.
b. Plan and Procedure – this tells what the student did in the experiment. It can be very loosely constructed up to being very scientifically presented using variables, math concepts etc.
c. Variables – these are things that can be controlled in your experiment. For example, if you are doing an experiment on whether or not plants need light to grow. You would probably set up a few plants to grow. You must keep everything the same among the plants (the air, temperature, water, dirt and seeds) and only change the amount of light that is given to each plant.
d. Observation – describe what happens. Make certain that your measurements are given with proper units (cm., degrees Celsius, etc.). Make certain you can give an idea if your measurements are inaccurate.
e. Math – this is mainly for Grade 5 and up, but younger students can certainly feel free to use these. They are mainly graphs (bar graphs, pie graphs etc.) but can progress to the area of analysis of error.
f. Conclusion – you can just restate the obvious using your data to support your conclusions. You can also state what limitations you set for yourself.
g. If possible, try to make your own inventions as measuring tools. For example, to measure the weight of something, try using a fish scale and see how it compares to a bathroom or kitchen scale.
h. Make certain that your exhibit states your conclusion and your results. And make certain that your board is neat and easily readable.
9. As a parent, please be patient!! Things can get dirty, messed up, broken (beakers in bathtub) etc. Remember your child is learning, and it is fun!
10. A project that may well be suitable for a Grade 1 student may not be suitable for a Grade 9 student unless several changes are made. On the judging form, the judges’ discretion can be applied.
11. Oral presentation – Make certain to tell the child to talk it up as much as possible. If they do not know the answer to one of the judges’ questions, please do not try to make up an answer. Tell the judge that you do not know but you maybe could try to find out the answer.
12. By doing a science fair project your child, the following attributes are also developed:
a. How to do an “hands-on” learning activity.
b. The understanding of the scientific process which can be used to make life choices down the road.
c.The opportunity to develop skills in research and gathering information and choosing what is important.
d.How to organize their work in a logical and meaningful way.
e.How to give clear, concise and grammatically correct reports and expressive and confident oral presentations.
f.Older students learn to apply mathematical skills to demonstrate or back up their findings.
g.Artistic skills which are used to create an eye-catching and effective display.
h.A science fair gives the more academically inclined students a chance to shine. Students are not all athletes and this allows those other ones to achieve some
recognition.
THINGS TO NOTE:
1.If you do any experiments involving people, including surveys or questionnaires,or vertebrate animals, there are certain ethical rules that have to be followed.These are very well explained on the Youth Science Canada (YSC) website. There are forms that have to be completed before the project can be legally displayed.
2.If the project goes beyond the school level, please note that NO project will be allowed to be demonstrated. For example, the student cannot explode their volcano at the fair. Also there are strict rules about having certain things on display at the project. Please have your child take photos and show these ontheir display. Videos are also well received and the judge can appreciate what your child has done in completing the project. The participant will have to have some way of showing the video to the judges. Fairs beyond the school level are open to the general public and we cannot take the responsibility of having someone grab something off the display and choke or eat it or things like that. This rule is well policed. Take pictures of your ingredients and use the pictures.
3.No more than 2 people can work on a project together.
4. At the Mountainview Science and Technology Fair, there are prizes given to some projects in the areas of biology, physics, nutrition, technology, agriculture, chemistry, environment, engineering and nature. Youth Science Canada Website – youthscience.ca